by Robin Taylor
As you’ve probably already heard, the Centers for Disease Control (CDC) predicts the 65+ age demographic in the United States is projected to increase to 19% by the year 2030, that is an estimated 71 million seniors. As Fitness Professionals, our job is to provide health and wellness expertise to help our clients and members live a functional and fit mobile life. Many of us are already working and training active agers and have already learned they are a very loyal, time flexible and lucrative population. If you haven’t had the pleasure yet, your chances are very high that you will soon.
 Older adults have a specific set of guidelines and activities designed to prevent injury and maintain mobility. The CDC has three options for safe exercise depending on the ability level. This weekly recommendation includes 150 minutes of moderate-intensity aerobic activity, 75 minutes of vigorous-intensity aerobic activity or a mix of moderate and vigorous activity for two or more days. All of these options are combined with 2 or more days of muscle strengthening.
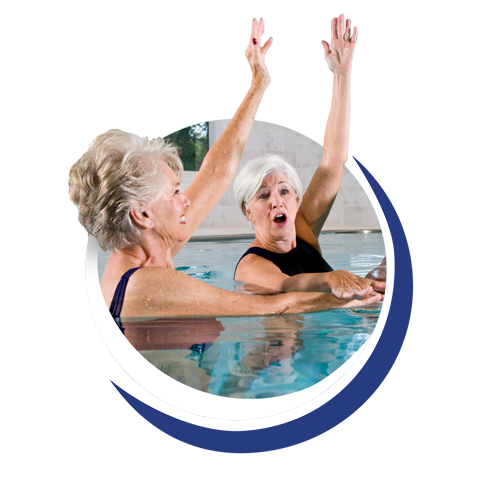
Reaching these weekly goals can be accomplished in multiple ways. A favorite method of exercise, due to comfort and socialization is aquatic exercise. Partaking in water fitness classes provides less impact on the joints (especially those with chronic disease), a variety of ways to move (standing or suspended) and a veil of privacy from being submerged. According to the CDC, it also improves or maintains the bone health of post-menopausal women.
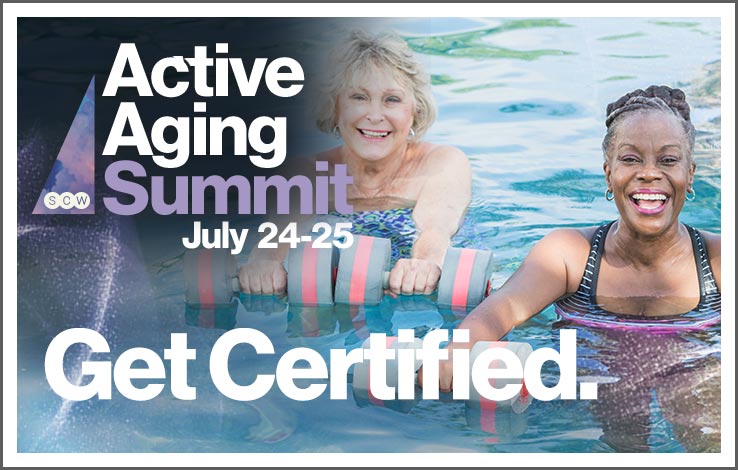
If you’re looking to add another skill set to your professional portfolio, here is the perfect opportunity. Registration is open for the Active Aging Summit, July 24-25. This two-day event covers all the trends and practical advice you need to help you and your senior clients succeed.
 New to the Active Aging Schedule are 12 aqua focused sessions. Our globally recognized aquatic fitness specialists, Ann Gilbert, MaryBeth Dziubinski, Manuel Velazquez, Billie Wartenberg, Jeff Howard and Cheri Kulp, cover the spectrum with workshops like “Aquatic Balance Solutions,” “Aqua HIIT & Run,” “Step On to Step Up” and “Rapid Resistance.” Take advantage of the newest wet-n-wild craze, “Aqua Running & Conditioning” led by Billie Wartenberg, and learn how to combine running, traveling, Tabata intervals , strength and more. Becoming proficient to work with the Boomer population by incorporating water fitness is a must. Adding new programming drives up excitement, enjoyability and revenue. Not to mention, your participants will be splashing and jumping for more.
The two-day event also incorporates 60 more practical and lecture sessions including topics designed around Function, Strength, Chair, Programming and Balance. Active Aging Summit starts at $149 (was $249) and includes 12 CECs/CEUs with 2 days of live stream sessions. For the best value available, take advantage of All-Access for an additional $30. Earn up to 19 CECs/CEUs and receive 30 days of access to all live-stream recorded sessions after the summit is complete.
Just think about your current clients and members and envision your career in the future. You will be fortunate enough to be working with a loyal, financially set and non-demanding group of people. Take advantage of upskilling and preparing today, so you are ready to tomorrow.
 About the Author, Robin Taylor
Robin is the SCW Editor for Spotlite, Tidal Waves and Weekly Work-UP, as well as Assistant Product Manager for MANIA® Fitness Conventions and Team Manager for WATERinMOTION®. Having taught Aquatic Fitness for over 15 years, Robin is AEA and AFAA certified and a WATERinMOTION® Champion. She has participated in several WIM educational videos, as both a pool participant and on-deck presenter. Robin has been an employee of SCW for almost five years. She is married and has two adult daughters and has a bachelor’s degree in journalism from the University of Florida.
by Chris Alexander
It is almost summer and in much of the United States that means thunderstorms, especially in Florida and other Gulf Coast states and throughout Texas, Oklahoma and Kansas, known as Tornado Alley. It may appear obvious that pools and lightning do not mix. That is certainly true for outdoor pools, but what about those indoors? You might think the practice of clearing indoor pools during thunderstorms keeps people safe, but in actuality, it may put them in higher-risk situations.
 A 2008 study found that from 1990-2003, no deaths were recorded from lightning during indoor swimming activities. There were 60 pool electrocutions during that time, but none were from lightning. The reason is due to the National Electric Code, which was adopted by every governmental body in the United States. It required all buildings to have the ability to shunt the voltage generated by a lightning strike. What that means is a building must have a complete lightning protection system and be properly grounded and bonded. Bonding involves joining the metal components of the pool and building together to form a pathway for stray currents to migrate without putting any individuals at risk. Grounding connects the bonded parts to the Earth’s surface to prevent the buildup of voltage. This helps prevent any hazards connected to equipment or people. Any indoor pool that is not up to the required code violates the National Electric Code section 250.4(A)(1), even if they close during a thunderstorm.
According to this code, it is safe for an indoor pool to remain open during a thunderstorm. By closing a pool, facilities take the risk of putting swimmers and water fitness class participants at greater danger than if they had continued their pool activities. Typically, patrons go to the locker rooms where there are showers and sinks. There have been numerous cases of shocks and electrocutions of people using these water sources. People have even been shocked using a landline phone. Lastly, members who leave the building must walk through the parking lot to get to their cars, exposing themselves to a direct lightning strike. In 2006, 99.5% of lightning-related fatalities occurred outdoors and only two occurred indoors. The idea that indoor pools should close during a thunderstorm is an “urban myth.”
A follow up study in June 2019, found that there is still no unanimity about whether to close an indoor pool during a thunderstorm. Pool operators were asked if their indoor pools were grounded and the results showed 79.9% said yes, 2.3% said no, and 17.8% did not know. When asked if their indoor pools were bonded, 53.5% said they were, 4.5% said they were not, and 42% were unsure. Lastly the survey asked whether their pools were required to have regular electrical inspections. This time the outcome wasn’t so spread with 32.3% not knowing, 25.9% agreed regular inspections were required and 41.4% said that they were not, but surprisingly 60% of pool operators did not know when the last electrical inspection had occurred.
 More statistics show 62% of indoor pools stay open during a thunderstorm, 52% stay open with no change in operations and 10% stay open but warn patrons about the storm being in the vicinity. Only 38% of indoor pool operators required swimmers to exit the water. Of the facilities that required patrons to get out of the pool, only 13% advised them to stay indoors, 43% allowed members to use showers and sinks, 34% allowed locker-room use but advised against taking a shower or using the sinks, and 1% did not allow anyone into the locker rooms until the storm had passed. When lightning and thunder occurred, 18% of the facilities had people remain on the deck, 12% said they could stay on the deck or go to the locker rooms and 19% had participants move to a secure location such as a gym. Almost everyone surveyed, 90%, had no restrictions on using land lines during the storm. It is no wonder that practices vary from facility to facility.
Hopefully, during the next thunderstorm your facility allows you to stay in the pool and continue your water fitness class, lap swimming or swim lessons. It is the safest place for you to be. It is recommended that when class ends or you finish your last lap, to exit the pool and dry off but stay out of the showers and don’t use a sink. Try to borrow a cell phone if you need a ride and stay indoors, away from windows and sliding glass doors until the storm passes. Use common sense and stay safe!
 About the Author, Christine Alexander
Christine Alexander is the author of Water Fitness Lesson Plans and Choreography, published by Human Kinetics in 2011. The book is sold in the United States, Canada, Europe, Australia and New Zealand.
Christine has been teaching water fitness classes since June 1993. Her first classes were at the YMCA, in Kenner, Louisiana, a suburb of New Orleans. She moved to Plano, Texas in 1998 and she currently teaches classes for the City of Plano Parks and Recreation Department at Oak Point Recreation Center. She also teaches sub classes for the City of McKinney Parks and Recreation.
by Cheri Kulp
As Aquatic Fitness Coaches, we deal with all types of obstacles. Teaching outdoors includes challenges like direct sunshine and thunderstorms, hard and/or slippery pool decks, and a lot of background noise from camp kids or even lawn mowers. Indoor pools have their own list of obstructions. Some natatoriums are small, creating an echo of sound from the music, causing instructors to strain their voices. Even with floor mats, the tile or stone floors can be a hazard. Lap swimmers, diving boards and kids playing and splashing are all cause for disruptions.
 Our job responsibilities include creating a fun, safe, engaging, and welcoming environment for our participants. We also need to show reliability, professionalism, and leadership, especially when it comes to following facility protocols. Pretty standard expectations, right? However, how often do we stop and think that a major and often overlooked part of our employee responsibility comes with taking care of ourselves as well?
Just like a first aid kit, having an action plan for the outdoor (and sometimes indoor) heat and humidity is important. Here are some basic supplies to help us, as instructors, survive and thrive. Surely there are many more items that can be added, but this short and easy to pack list is a must have for a successful summer teaching experience.
Kit Contents
- Water/Electrolytes
- Sunblock-at least 30 SPF, zinc for the nose
- Hat/shirt with sun protection and moisture wicking material
- Sunglasses w/UV blocking & polarized if possible
- Wet/cool towel
- Umbrella/shade
- Pool/deck shoes
- Snack bars (for between classes)
- Props for visuals (to protect voice)
Building a Summer Survival Kit
Stay hydrated: Remember to bring water (plain or with electrolytes) with you and keep it within reach while teaching. Quite often we do not feel the initial effects of dehydration, which include feeling thirsty, dark yellow urine and skin that is not elastic. Dehydration can lead to more serious symptoms such as dizziness, fainting, and excessive sweating. The CDC recommends drinking about 8 oz. every 15-20 minutes when working in heat and sun.
30+ SPF sunblock: The American Academy of Dermatology (AAD) states that one in every five Americans will get skin cancer at some time in their life. Sunscreen that offers broad-spectrum (UVA and UVB) protection, contains an SPF of 30+ and is water-resistant is best. Apply 15 minutes before going out in the sun. Reapply every two hours and after swimming and sweating.
Appropriate attire: Lightweight, light colored clothing that offers sun protection and made of a moisture-wicking material is best for outdoor teaching. Wearing a hat that provides shade on the face, ears, eyes, and neck along with sunglasses will provide great protect as well.
Cool towel or cloth chamois: Try wetting a towel or cloth chamois and wearing it around your neck to keep you cooler while teaching. It will also help dry sweat faster minimizing the energy expenditure of your body.
 Umbrella/other shade: Check to see if you can teach in an area that has an umbrella or a shaded area. If designated shade isn’t available, see if a swim or dive coach has one to borrow.
Shoes: Whether you are in or out of the pool, non-slip shoes are a must. Either aquatic designed or land fitness shoes will work. This way your feet are protected on the top and the bottom.
Snacks: As we sweat, our blood sugar can drop. Having a protein or granola bar near by provides that quick energy boost to keep you going.
Props/mic: As mentioned, extraneous noise is sometimes surrounding the class. Using a pair of shoes on your hands to demonstrate your feet, especially when doing a suspended move, is a great visual. Also, find out if a water proof mic is available. It is definitely a life ring for your voice.
Weather Changes
Depending on where you live, sometimes the weather can be an issue. In some places storms just pop up at the last minute. Find out your facility protocol and become knowledgeable on what to do when there is thunder, lightning and high wind.
Thunder/lightning/sudden storms: Make sure to understand the protocols and procedures for your facility in the event of severe weather and be prepared to assist if needed. Your knowledge and leadership can go a long way to helping class participants feel comfortable and remain calm.
Wind: Excessive wind can quickly cause hypothermia (drop in core body temperature) even when it is warm outside. It may be necessary to cancel class in some cases. Check with management if in doubt.
Tips For Teaching Your Best
Stay physically fit: Invest some time into developing your own fitness routine, whatever that looks like to you. Staying physically fit helps your body deal with stress and fatigue.
Limit alcohol and other dehydrating liquids: Consuming drinks such as alcohol, caffeinated coffee, teas, and sodas will increase dehydration and fatigue.
Adequate rest and recovery: Make sure to get enough sleep and allow your body ample recovery time in between particularly challenging or high temperature workouts.
Remember, this is just the basics. Your location, surroundings and environment might require specific items. Being prepared with a well-stocked survival kit and knowledge on outdoor summer weather conditions will not only help to keep you safe as an individual and instructor, but it will also create a grounded, professional environment for your class participants for summers to come!
What’s in your kit? Stay cool and splash on!
 About the Author, Cheri Kulp
Cheri Kulp has been a certified instructor for over 30 years. She holds a degree in special education and has previously taught for 18 years. Cheri has been a WATERinMOTION® champion for a decade and is the choreographer for the new aqua dumbbell program, WATERinMOTION® Strength. Her areas of expertise include presenting at SCW MANIA® conferences for 4 years, personal trainer, ARC lifeguard, swim instructor and Les Mills instructor. She has appeared in over 25 videos.
About the Author, Cheri Kulp
Cheri Kulp has been a certified instructor for over 30 years. She holds a degree in special education and has previously taught for 18 years. Cheri has been a WATERinMOTION® champion for a decade and is the choreographer for the new aqua dumbbell program, WATERinMOTION® Strength. Her areas of expertise include presenting at SCW MANIA® conferences for 4 years, personal trainer, ARC lifeguard, swim instructor and Les Mills instructor. She has appeared in over 25 videos. 
by Connie Warasila
Effective fitness instruction from the pool deck is key to an aqua participant’s exercise experience. There’s nothing more frustrating than attending a fitness class and the instructor fails to communicate exactly what and how a movement is supposed to be performed. Keep in mind that “communication” refers to more than the spoken word. Everything your body does is a form of communication. The biggest challenge in leading water exercise classes is physically demonstrating moves, gravity versus buoyancy. Taking the time to hone verbal communication skills is only half the battle. Knowing visual communication can be an even more valuable tool for leading a class and understanding the simulation of various levels in the water presents unique challenges for aquatic leaders.
 The various levels used in aquatic exercise are based on depth position in the water; power rebound, rebound, grounded, neutral and suspension. Each requires its own set of specific techniques to accurately and safely communicate the level.
Power Rebound is used to intensify rebound movements. Individuals challenge themselves by pushing off the pool bottom with more force than rebounding, creating an explosive upward movement out of the water. This momentum can be combined with a tuck (lifting the knees to the water’s surface) for even more intensity. Demonstrating this level is very difficult for an instructor and requires careful planning. Showing a power rebound move on deck is like plyometric training. The actual jump up may not be the rough part, but the landing will introduce very high levels of shock impact, especially on a surface that is typically unforgiving. Here are some ideas to demonstrate this intense level:
- Instruct the class to perform the move using both of their legs at the same time as you demonstrate with one leg. This can be confusing for some students, so be sure to reinforce two legs.
- Use a chair or stool to sit on while you lift both feet up. Again, this simulates the move but does not completely show the true desired movement. Be sure to say and show the power.
- Use a chair or stool as upper body support, lean on the chair while lifting both feet. You will still experience some shock impact, but less than full demonstration.
- Use your hands, inside a pair of shoes, to show what the feet should be doing. Actually, bend down and put your hands (w/shoes) on the floor to show landing and then lift both hands to show the feet jumping up.
- Consider getting in the water after showing the move on deck to demonstrate the level’s intensity.
Rebound is commonly used for cardiovascular exercise in water. It involves pushing off the bottom of the pool, momentarily suspending the body up in the water and then landing again on the pool bottom. Instruct clients to roll through the foot from toe, to ball, no touch, to ball, to heel and to use soft knees when landing, creating a shock-absorber effect. Translating rebound movement out of the water is a challenge because buoyancy assists water movement, but on deck gravity resists rebounding. There are some tricks-of-the-trade that help to safely communicate rebound level.
- Loading down – bend the knees and lower the body’s center of gravity when showing the landing on the pool bottom, usually on the beat of the music.
- Prepare for the loading down by pre-lifting the body upward, like taking a breath before singing. Rise up on your toes, lifting the heels to show upward movement, without fully leaving the ground.
- Shift the body’s weight slightly forward to balance on the balls of the feet.
- If you feel that it is necessary to fully rebound to demonstrate the desired movement, limit full rebound on the deck to 2-4 beats of music.
- Always teach on a safe surface. There are many mats that are perfect for the pool deck. Look for non-slip, anti-fatigue material. Home improvement stores may carry an item in the flooring department that is affordable and effective. Commercial kitchen mats are good on the deck, plus they have holes so water can’t collect.
 Grounded level is performed while staying connected to the pool’s bottom. This level requires more awareness of core muscles and their role in maintaining upright posture. This is probably the easiest level to demonstrate from the deck. Clearly explain and demonstrate core muscle engagement and encourage students to maximize the use of the water’s resistance.
Neutral level is similar to grounded in that the feet stay on the pool bottom. The difference is that neutral level requires lowering the body down into the water with the shoulders under the water’s surface. Most of the body’s weight is now supported by the water. Teaching neutral level from the deck can be challenging because the body stays in a squatted position, recruiting core and lower body muscles. Be careful to maintain upright posture to avoid back discomfort. Here are some ideas to demonstrate neutral level:
- Bend at the knees to lower your center of gravity.
- Keep shoulders over hips and maintain upright posture.
- Use a chair or sit pool side to simulate the lower position of neutral.
- Use your arms to demonstrate leg movements.
- Consider getting in the pool for a moment to teach proper lowering into the water.
Suspension is performed with both feet up off the pool’s bottom. Suspending in shallow water offers a core challenge so encourage students to stay in the same depth for suspension as they did for other levels. Demonstrating suspension is a bit of a magic trick on deck. It is impossible to defy gravity so any demonstration will have to be a simulation. Here are some tips:
- Demonstrate the move with one leg while verbally cueing the students to perform the move with both legs.
- Use your arms to demonstrate leg movements.
- Sit on a chair/stool or pool side to enable two-leg demonstrating.
Regardless the level to be demonstrated, make it your goal to communicate (as realistically as possible) the movement you expect your students to perform in the water, with your body on land. The more you describe and demonstrate, the better the experience will be for your students. Be creative, be safe and be enthusiastic. Providing this service not only benefits your clients well, but also your longevity and respect as a fitness leader.
 About the Author, Connie Warasila
Connie is the choreographer for WATERinMOTION®, faculty member of SCW Fitness Education, and certified by ACE, AEA, AFAA, Balanced Body, The Braining Center, Yoga Fit, Schwinn®, Reebok Cycle, and Moms in Motion. Awarded the Aquatic Exercise Association Fitness Professional of the Year, Connie has over 30 years of teaching experience in the USA and abroad. She enjoys traveling around the world presenting new and creative workshops to make fitness more accessible, professional, and fun.
by Melissa Layne, M.Ed.
As we age, mornings seem to be the most uncomfortable time for our bodies. Many inflammatory conditions and overuse injuries are worse at the start of the day. Arthritis is just one example of many, and studies show it is not in our imaginations. There is actually a physiological reason why the pain and stiffness in our joints is worse in the light hours of early morning.
 Arthritis is an inflammation of the joint capsule. In a healthy joint, the ends of the bones are encased in Teflon-like smooth cartilage called hyaline which allows them the ability to slide over each other. The ends of the bones are also protected by a joint capsule lined with a membrane that produces synovial fluid. The capsule and the fluid protect the cartilage, muscles and connective tissues such as tendons and ligaments. As we age, there is a natural decrease in the amount of synovial fluid produced and if arthritis is in play, the cartilage becomes worn away as well. The joints begin to feel stiff and sore, especially in the mornings.
In August 2016, a group of researchers published a study with conclusions that may help to explain this timing phenomenon. Using mice injected with collagen, which promotes the arthritic condition, allowed researchers to examine the patterns of inflammation that occurred in the affected tissues. Studies showed that inflammation was the worst in the hours of the day with the most sunlight and the inflammation lessened in the dark overnight hours. However, it did not lessen if a light was left burning. So, the light was the catalyst, not the circadian rhythm of the mice.
When the researchers examined the affected tissues, they discovered a protein called cryptochrome was present. This protein is actually produced while you sleep and helps maintain a normal sleep cycle of awareness in the day light hours and a state of recovery in the dark hours. Therefore, at night, the cryptochrome is abundant in your body and it plays an anti-inflammatory role. As the sun rises, the amount of cryptochrome in your body decreases and the inflammation in the joints increases, beginning another attack on your joints.
The timing of inflammation is not contained to the joints. Research has shown that the inflammation that plays a role in heart disease and diabetes is also decreased at night due to cytochromes and increased during the day due to the lack of the protein. For this reason, insomniacs and others who do not sleep at night (third shift workers and those with rotating shift hours) may be more prone to disabilities related to inflammation.
 In a country where sleep is already lacking due to our quest for productivity in the workplace, in addition to the stress produced, it is no wonder that cardiovascular disease is the number one killer in the U.S. Also, as we age, we produce less melatonin which makes getting eight solid hours of sleep even more difficult. To help decrease the insomnia which increases inflammation, we need to make more melatonin. This hormone is regulated by temperature, light and other hormones and is produced in the hypothalamus area of the brain. Our bodies can make more melatonin if we keep our bedrooms colder, avoid all forms of blue-green light an hour before bed and also sleep in loose fitting clothing.
As far as the pain of arthritis, research shows that exercise truly does not reduce the symptoms. Any fitness class participant that suffers from a synovial fluid condition needs a longer warm-up, more modifications, and a shorter lever length in the affected limbs. An aquatic environment is an ideal place for an individual suffering from arthritis due to the natural resistance occurring in the water. Participants do not have to grip resistance equipment and the buoyancy of the water also allows some the pressure to be taken off the lower limbs if arthritis is present in the hip and/or knee joints.
Whether your body is battling an inflammatory condition or you overworked your muscles, the pain you feel in your body is real. It can be helped with proper sleep and allowing melatonin levels to increase. Exercising in an aquatic environment is ideal due to the properties of the water, plus the benefit of a comfortable temperature and unweighted feeling provides an enjoyable, soothing setting.
For more information and education about aging, strength training, functionality, balance, immune diseases, fall prevention and much more, register for the Active Aging Summit, July 24-25, for only $149. Choose from 72 sessions filled with practical advice and workshops to help you and your clients succeed and learn from 33 experts in the health and fitness industry while earning up to 15 CECs/CEUs with the All -Access Pass. This is your opportunity to learn from the best and motivate your clients with the latest research-based information needed to advance your career and create a sense of accomplishment.
 About the Author, Melissa Layne, M.Ed.
Melissa is a Kinesiology Department faculty member at the University of North Georgia. She has 30 years of experience in the fitness industry and a master’s degree in Exercise Physiology. She taught elementary PE and coordinated fitness programs for Royal Caribbean, Home Depot, and orthopedic surgeons. Melissa is the author of WATER EXERCISE (Human Kinetics 2015), a member of the SCW educational faculty & has been featured in numerous fitness education and training videos. She is an expert at organizing complicated material into easily understood pieces.

Packed with essential nutrients, vitamins, and fiber, the beetroot, or more commonly known
to many of us as the beet, is anything but ordinary. They grow in a variety of gorgeous colors like pink, purple, yellow, white, and striped. The numerous health benefits work to lower blood pressure, improve blood flow, and increase exercise performance while reducing inflammation.
 The average beet contains the following:
Calories: 64
Protein: 2.5 gm
Fat: 4.5 gm
Carbohydrates: 5 gm
Fiber: 2 gm
Trace vitamins and minerals: copper, vitamin B6, vitamin E, potassium, magnesium, and iron
Beets can be prepared and eaten in a variety of ways, including consuming the leaves like spinach, as well as juicing the whole beet itself. Here is one of our favorite recipes:
Roasted Beets w/balsamic glaze
Ingredients:
Bunch of beets (from local grocer or farmer’s market)
- 2 tsp. Extra virgin olive oil
- ½ C. Balsamic vinegar
- 1 tsp. Grated orange zest
- Salt
- Freshly ground pepper
Directions:
- Scrub beets and remove green tops (remember to save).
- Line baking pan with aluminum foil.
- Rub olive oil on washed beets and sprinkle with salt. Wrap foil around beets.
- Set oven to 400 degrees and bake for 1 ½-2 hours(depending on beet size). Make sure to cook the full time, since more caramelization will occur. Beets are fully cooked when fork inserts easily to center.
- Remove from oven.
Preparing the glaze:
Combine sugar and vinegar in saucepan over high heat. Continue cooking over high heat until liquid reduces to glaze consistency.
Once the beets have cooled to touch, remove outer peel and cut into quarters. Put into prep bowl. Pour glaze over beets. Sprinkle with desired amount of salt and pepper.
Garnish with orange zest. Can be served as a side dish or mixed into salads for added color.