by Christine Alexander
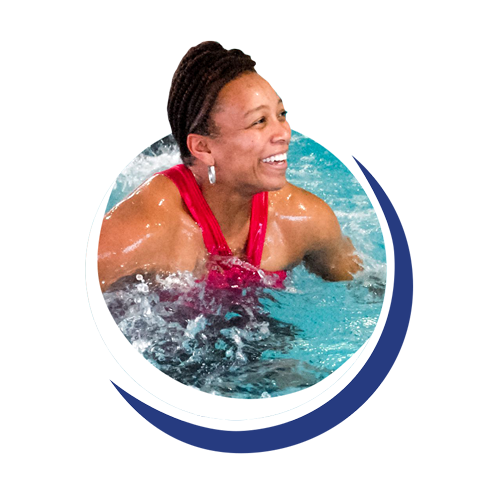
There are those who are passionate about deep-water exercise, and I am one of them, but for others who have never tried it, the concept offers a degree of mystery. One concern I hear most often is, “I don’t think I could tread water for an entire one-hour class.” You don’t have to! Everyone should wear a flotation belt in deep water. Another apprehension is, “Can you get a workout in deep water as intense as the workout in shallow water?” The answer is definitely, yes!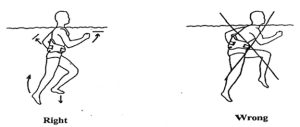
Let’s talk about the flotation belt for a moment. First, fit is key. It needs to be attached tightly around your waist so that it doesn’t slide up under your arm pits. Second, practice stabilizing. Since your feet don’t touch the pool floor there may be a tendency to tip forward or backward. The core muscles must learn to contract to keep you upright, which is why most people see improvements in their core strength after participating in deep-water classes. The next focus is to learn to continue to maintain proper posture, ears over shoulders over hips. The body works against the water’s resistance from the neck down, so instead of trying to streamline by rounding forward which compresses the spine, (see image above) keep everything aligned.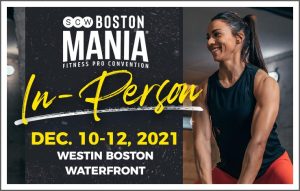
The second concern is getting an intense workout in deep water. Once successful method is high intensity interval training (HIIT) where you work at 80-90% of your maximum effort for short bouts followed by periods of active recovery. Achieving maximum effort requires focus. Your motivation determines the number of muscle fibers that need to contract and the speed of those contractions. It’s important to stay actively engaged, not daydreaming or chatting with another participant. The strategies for achieving high intensity in deep water are like shallow water, but with a few differences.
Start with the Basics
In a deep-water class there are 5 basics: jog, bicycle, kick (front, side, back), cross-country ski, and jumping jacks (minus the jump.) These moves can have multiple variations.
- JOG
- legs can be either hip distance apart or wide.
- cross the midline in front of the body with an inner thigh lift or in back of the body with hopscotch
- side-lying or diagonal, just lean the body to the side and pull knees toward chest
- BICYCLE
- feet under the torso rotating in a circle- can be small like a unicycle (knees stay bent) or large (bend and extend legs while circling
- lean diagonally to the side and continue to rotate from the hips
- KICK
- flutter kick- legs extended down or in any direction
- straight legs front, side or back (make sure to lean slightly forward to protect back) – hip width, wide legs, single leg, alternating legs
- bent knees front- either a flick from the knees or a soccer (from the hips and knees)
- Cossack kick – a kick from the knees to the sides
- karate kick side- single leg, chamber knee & extend leg
- bent knees back- either a hamstring curl or a bend and extend
- CROSS-COUNTRY SKI
- upright or angled diagonally
- add a tuck
- JUMPING JACK
- Both legs abduct from the body at the same time, arms are opposite of the legs to help body stay afloat
- add a tuck
- Seated or “V” jacks
All the base moves can be varied by using different arm movements or foot positions. Also adding travel raises the challenge level (and adds a bit of fun competition.)
Increase the Range of Motion
As you probably know, large moves take more effort than smaller moves. Increasing the range of motion is one way to increase the intensity variable. Here are some examples to create bigger movements:
- Raising the knees higher and pumping the arms while in a jog
- Inner thigh lift with wide feet reaching toward the ankle with opposite hand
- Hopscotch with feet wide reaching toward opposite ankle behind the body
- Bicycle in large round circles
- Kick higher in front
- Cross-country ski with straight arms or helicopter ski (moving the legs in semi-circles around the body instead of in straight lines)
- Jacks with midline cross, Cheerleader (focus on ABductors), Rocketship (focus on ADductors)
Focus on achieving your full range of motion. For some, this may be very intense, so alternating smaller base moves with full range creates an interval challenge.

Add Speed
Making a move faster increase intensity, however often the range of motion decreases. Try to be aware of body control when adding speed and pay attention to your movements to avoid recklessness. Speed is a second intensity variable. Alternate base moves with faster exercises for your intervals until that becomes easier.
Add Acceleration or Force
There are two ways to work against the resistance of the water.
One is to accelerate your leg movements toward center to propel your shoulders out of the water. This is called adding elevation. Some examples are
- Frog kick
- Breaststroke kick
- Cross-country ski
- Tuck ski together (scissors kick).
The body will rise and sink rhythmically. You can also use a scull your arms to lift your shoulders out of the water with a jog, bicycle, or flutter kick.
A second way is to accelerate against the water’s resistance or create more force. Some examples are:
- Adjust a jog into a steep climb- extend your arms and press alternating hands down while lifting the knees high and then pressing the heels down toward the pool floor, as if climbing a steep mountain with trekking poles.
- Lift your inner thigh with power as your press the opposite hand down forcefully toward the thigh.
- Bicycle with power as if you are climbing a hill in first gear
- Perform a high kick powering the leg on the downward phase or add power in both directions
- Back kicks (straight or bent knees), cross-country skis, and deep-water jacks can all be performed with power
Be mindful about what you are doing because the harder you push against the water, the harder the water pushes back. Acceleration is a third intensity variable. Alternate base moves with accelerated moves for your intervals until that becomes easier.
Combine Intensity Variables or Work in More than One Plane
One strategy for continuing to perform HIIT once you have achieved your fitness goals is to combine intensity variables. Go for full range of motion with power, elevation with speed, or power with travel continuing to use force as you move across the pool.
Another strategy is to work in two or three planes at once. Alternating a move in the frontal plane, such as a frog kick with another move in the sagittal plane, such as a tuck ski together, is an excellent option to increase intensity. Also, consider having the arms work in one plane with leg moves in another plane.
For example:
- Jumping jacks (frontal plane) with clapping hands (transverse plane)
- Cross-country ski (sagittal plane) with arms sweeping side to side (transverse plane)
- High kick (sagittal plane) clapping over the kick (transverse plane) then under the kick (frontal plane)
Continue to focus on what you are doing, and your periods of high intensity will leave you breathing hard. You will need those periods of active recovery to catch your breath.
Sometimes all it takes is to jump in with both feet (and a floatation belt) to try something new. Deep-water HIIT aqua fitness can be a challenge for some, but in the end, most finish with a deep satisfaction of success and the desire to try it over and over. Remember range of motion is key, followed by speed and then force. A little friendly competition thrown in adds another element of fun, not to mention the new friendships being built.
 About the Author, Christine Alexander
Christine Alexander has been teaching water fitness classes since June 1993. Her first classes were at the YMCA, in Kenner, Louisiana, a suburb of New Orleans. She moved to Plano, Texas in 1998 and currently teaches classes for the City of Plano Parks and Recreation Department at Oak Point Recreation Center. She is the author of Water Fitness Progressions published in 2019 and Water Fitness Lesson Plans and Choreography, published in 2011, both by Human Kinetics. The books are sold in the United States, Canada, Europe, Australia, and New Zealand. She has a blog at https://waterfitnesslessonsblog.com/
by Connie Warasila
In today’s vernacular, the word drag typically derives negative connotations. People refer to chores, work, and even exercise as a “drag.” Most of the time, we don’t want to drag an object. It creates a time lag, an effort and sometimes a mess. Race cars are designed to reduce drag so that speed is enhanced. Ships are designed to minimize drag to not only increase speed but also for fuel economy. Even competitive swimmers hone their strokes to minimize drag and attain a faster time. There are situations when “drag” is a good thing. Paratroopers rely on parachutes to create air drag in order to land safely on the ground. Disc brakes on motor vehicles use friction to create drag and slow the vehicles to a stop. However, when it comes to aqua fitness, drag takes on a whole new meaning. Simply moving through water offers a challenging resistant environment in which to exercise. And, for participants interested in vigorous movement that stimulates a cardiovascular or muscular response, water fitness is a safe and effective setting for physical training. That being said, water fitness instructors have the opportunity to give “drag” a good name.
Drag is simply defined as resistance experienced by a body moving through a fluid medium, like a human body or the limbs when traveling through the water. Because of other physical properties in water, i.e., viscosity, friction, adhesion, and cohesion; drag is a common experience in the water. The more drag created; the more turbulence is visible. So, increasing drag will make water exercise more challenging. Conversely, using less drag will require less effort, which may be important for clients who may need movement regressions.
Manipulating drag to meet the needs of the water exercise client relies on various factors: surface space, lever length, speed, directional changes, and the client’s willingness to consciously exert muscular force.
Surface space refers to the amount of area presented to the direction of movement. For example, sweeping a gloved, open hand through the water with the palm perpendicular to the direction of movement would be harder than slicing that hand or punching a fisted hand through the water.
Lever length also affects how much drag is experienced in the water. Moving a short lever (leg with knee bent) is less strenuous than moving a long lever (straight leg) through the water, at least when applying some speed and muscular force. Short lever movement is appropriate for warm-up activities and clients with specific regression needs. Long lever movement is appropriate for more strenuous cardiovascular and muscle-focused exercise. Even pointing and flexing the foot can change the amount of drag.
As mentioned, movement speed also affects how much drag is being used in water movement. The use of speed to increase movement intensity should be used with caution, especially while using long lever moves. The faster exercisers attempt to move through water, the more drag will be utilized making the movement more intense. For fit and skilled clients, increased speed can offer a very motivating and positive experience. On the other hand, clients functioning with orthopedic limitations may find the introduction of speed frustrating and possibly painful. Keep in mind that speed of movement needs to be a personal choice. We all move at our own speed.
Introducing quick directional changes with the use of muscular force also will increase the amount of drag opposing exercise movement. For example, performing a one-leg swing (front and back) uses drag and overcomes inertia and water momentum in both directions of movement. Changing the direction of travel can also increase drag but should be used cautiously with clients that are fit, skilled and kinesthetically aware of their body and space.
The last, and maybe most influential, factor in manipulating drag is an exerciser’s willingness to recruit muscle force. Educated students can choose the most effective amount of drag for their fitness and skill level. Sharing information about drag and its effect on water exercise is imperative if clients are expected to self-regulate their use of force during exercise. A motivating, positive delivery of cues will also encourage an appropriate use of drag.
Once students’ fitness and skill levels have progressed to a point where they are able to generate great force using drag, consider adding equipment that adds increased challenge. In water fitness, there is always somewhere to progress to and regress from. What a beautiful and dynamic setting for exercise. Go get your drag-on!
 About the Author, Connie Warasila
Connie Warasila is the former choreographer for WATERinMOTION®, faculty member of SCW Fitness Education, and certified by ACE, AEA, AFAA, Balanced Body, The Braining Center, Yoga Fit, Schwinn®, Reebok Cycle, and Moms in Motion. Awarded the Aquatic Exercise Association Fitness Professional of the Year, Connie has over 30 years of teaching experience in the USA and abroad. She has recently decided to further her education and pursue a degree in Finance and Accounting to help the fight against Human Trafficking.
by Irene PluimMentz, PT
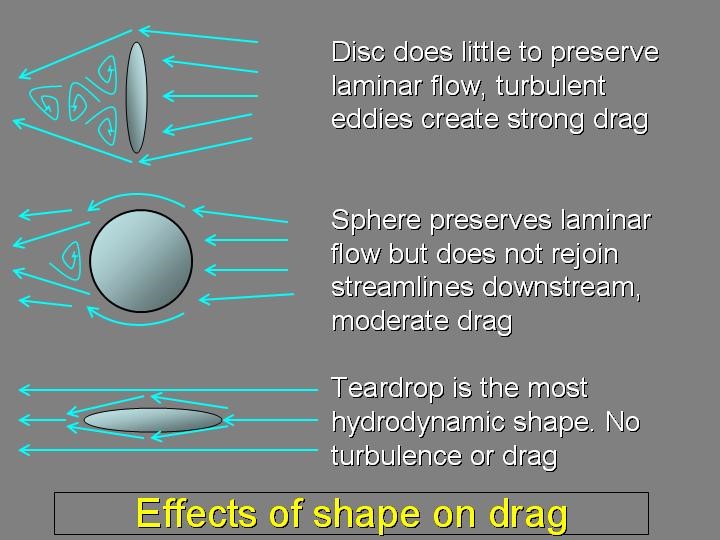
According to the Merriam-Webster dictionary, the word turbulence has multiple definitions, like great commotion or agitation. As Aquatic Fitness Professionals, understanding this term related to exercise, specifically water, brings on a whole new meaning and training tool.
Turbulence can be caused by obstructions or sharp directional changes in the flow of a liquid, or by the mixing of two or more layers of fluids with different densities. There can also be turbulence with chaotic changes in pressure or velocity of a fluid. This result is different from drag, which is created by pushing objects through a liquid, having to break the viscosity between the liquid’s molecules. However, since turbulence is caused by obstructions in the liquid, it behaves like drag resistance.
If you look at water flowing through a river, you will see regions where it runs calmly, called a laminar flow. If rocks are placed in the water, the result might create foam and maybe some eddies. In this case the flow of water is called turbulent flow. Now imagine yourself standing in this calm flowing river; you feel some resistance but nothing you can’t withstand. Next you move toward the rocks with the foamy, turbulent water; you can barely maintain your balance! The drag force created by the laminar flow is proportional to its velocity, while the drag force of the turbulent flow is squared to the velocity.
Let’s apply this knowledge to aquatic training. When an object, let’s say your arm, is moved through the water it creates a higher pressure in front of it and lower pressure behind, which then is being filled in. If your arm is moved relatively slow, the water molecules can fill up the created space without any rush causing less turbulence. However, when your arm is moved more quickly, the water will try to rush filling in the low-pressure area behind it, causing more turbulence due to the irregular flow pattern.
Then, if we add something to your arm to increase its frontal area (shape drag), it will take more force, i.e., strength, to move it. The flow of water around the larger surface makes more water adhesion which needs to be broken up in front of the increased surface, and more space behind the increased surface needs to be filled. Thus, more turbulence is created, and more turbulence means more force required.
Another way to utilize the benefit of turbulence is by changing the lever of movement. By increasing the lever length, like extending the arm further, we see a combination of increased speed at the end of the outstretched object (the hand) and depending on arm position or equipment used, also an increase in surface area. If you want to keep the speed of movement in the shoulder constant, this extended lever will require more force. So, when taking exercise into the water, variety in requested effort can be created by changes in speed, surface area, lever, and combinations thereof. Equipment choices allow us to utilize any and all of these options and combinations.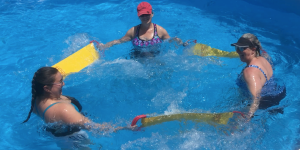
Not only can turbulence be used for strength training, but for balance and muscle coordination as well. Think of the example given earlier of standing in a river, or the difference of standing in still water compared to the surf of an ocean. By creating turbulence around yourself or having somebody else create it for you (less predictable, therefore greater challenge), your ability to maintain your balance will be challenged. And that provides for training opportunities.

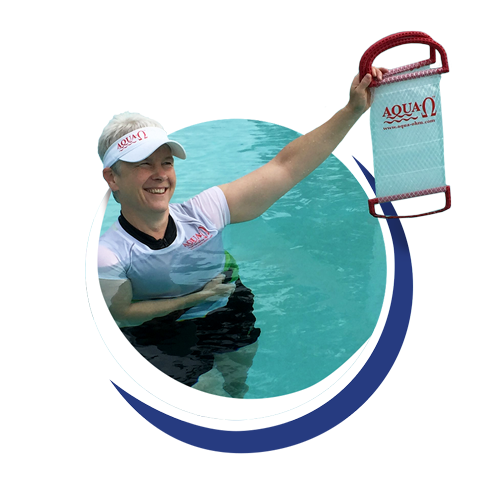
The Aqua-Ohm provides all the above. It can enlarge the surface area of your arm, leg, or body in different ways, aiding in requesting an increased muscular response during movement. It does so without adding buoyancy, ensuring joint alignment is not compromised. And because the Aqua-Ohm is not rigid, it elicits muscle coordination due to the irregular movements caused by the flexible material in combination with the developed turbulence. Since it is possible to change the length of the Aqua-Ohm, it allows for lever and surface area adjustability.
To experience what the Aqua-Ohm can add to your aquatic programming, come join us at SCW MANIA® in Boston, December 10-12, 2021, or visit www.aqua-ohm.com and check out our events page for other locations. Take the time to watch some of our helpful videos and clips of examples for exercises. Feel free to contact us at info@aqua-ohm.com with any questions about using turbulence and the Aqua-Ohm as training tools.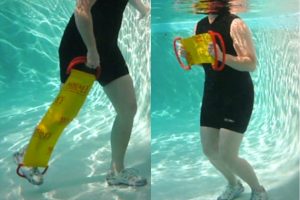
 About the Author, Irene PluimMentz, PT
Irene PluimMentz became a licensed physical therapist in the Netherlands before immigrating to the United States. She is the co-owner of One Step Beyond, Inc. Physical Therapy. Irene’s passion for anything “water” led to becoming an AEA certified instructor. She integrates her knowledge of hydrodynamics with physical therapy into all her sessions. Irene is the inventor and developer of the Aqua-Ω adjustable drag resistance water exercise equipment.
by Connie Warasila
Many pools and wellness facilities have reopened, and group ex instructors have returned to the front of their classes once again, to pursue their passion. Over the last 18 months, fitness professionals had plenty of time to refresh their continuing education credits and pick up the latest education to bring back to their students. Much of the new information was geared toward those that teach land-based movement but, introducing the latest aquatic exercise research was a little more challenging, since watching Zoom sessions while in a pool was not practical.

Most water fitness instructors teach from the deck, as they should, in order for their participants to see and hear movements easier. Online education has shown to be beneficial from that standpoint. Much of the teaching related to popular programming and new formats, but some of what was missing was “the basics”. Even though we strive to equip instructors with the most thorough instruction about movement on deck and in the water, analyzing basic exercises, demonstration, and visual delivery is commonly left out.
Here’s a refresher of two important topics to practice when demonstrating aquatic movements on the deck.
Understanding the concept of LOADING DOWN is one of the most important basic skills in water fitness demonstration. Successfully showing this model is challenging for many and is an ability that most instructors need to practice again and again.
Let’s review! Loading down is simply showing, from the deck, a simulation of rebound movement in the water. It is important to communicate to students that some water movements are performed with a rebound (jump). Verbally cueing rebound is good but showing rebound is better! Here are some ideas to improve your loading down skills:
- Loading down – bend your knees and lower your body’s center of gravity when showing landing on the pool bottom, usually on the beat of the music.
- Prepare for the loading down by pre-lifting the body upward, like taking a breath before singing. Rise up on your toes, lifting your heels to show upward movement, without fully leaving the ground.
- Shift your bodyweight slightly forward to balance on the balls of your feet.
- If you feel that it is necessary to fully rebound to demonstrate the desired movement, limit full rebound on the deck to 2-4 beats of music.
- Always teach on a safe surface. There are many mats that are perfect for the pool deck. Look for non-slip, anti-fatigue material. Restaurant kitchen mats are excellent and inexpensive and can typically be found in home improvement stores and Amazon
Once the concept of loading down is mastered, then understanding how to demonstrate BASIC AQUATIC MOVES becomes a lot easier to teach. Here is a chart of the “most commonly” taught water exercises. Take notice of the variations, joint actions, main muscles involved, and notes to clarify the movements. Water movement can be categorized into three main categories:

- One-footed rebound (hop or jog)
- Leg swings, soccer kicks, jog, run, kicks, pendulum
- Two-footed rebound (jump)
- Jump rope, jumping jacks, moguls, tuck jumps
- Suspension (no contact with the bottom of the pool)
- Cross country, jacks, shoot throughs
MOVE | VARIATION | JOINT ACTION | MAIN MUSCLE | NOTE |
REBOUND: One-Footed | ||||
Jog/Run | Hip-Width | Knee and Hip Flexion/Extension | Hip Flexors, Hamstrings, Quads, Glutes | Lift knee to hip height |
Wide | Feet wide or knees externally rotated | |||
Heel | Knee Flexion | Hamstrings, Quads | Bend knee and lift foot toward glutes | |
Kick | Straight Front | Hip Flexion | Hip Flexors, Quads | Pointed toe increases drag |
Flick | Hip and Knee Flexion/Extension | Hip Flexors, Quads | ||
Straight Back | Hip Extension | Glutes | Avoid spinal extension | |
Karate Kick | Front | Hip and Knee Flexion/Extension | Hip Flexors, Hamstrings, Quads, Glutes | Emphasize the chamber as preparation, strike with the heel |
Side | Hip and Knee Flexion/Extension, Hip Abduction | Hip Flexors, Hamstrings, Quads, Glutes | ||
Back | Hip and Knee Flexion/Extension | Hip Flexors, Hamstrings, Quads, Glutes | ||
Leg Swing | Front/Back | Hip Flexion/Extension | Hip Flexors, Quads, Glutes | Maintain a rebound |
Side/Cross | Hip AB/ADduction | Inner Thighs, Glutes | ||
Pendulum | Hip AB/ADduction | Inner Thighs, Glutes | Emphasize the inward movement, touch feet together in the middle | |
Leap | ALT Leap | Hip and Knee Flexion/Extension | Hip Flexors, Hamstrings, Quads, Glutes | Use a powerful push off the pool bottom |
Same Lead F | Hip and Knee Flexion/Extension | Hip Flexors, Hamstrings, Quads, Glutes | ||
Same Lead S | Hip and Knee Flexion/Extension, Hip External Rotation, Hip ABduction | Hip Flexors, Hamstrings, Quads, Glutes, Inner Thighs | ||
REBOUND: Two-Footed | ||||
Jump | Jump Rope | Knee and Hip Flexion/Extension | Quads, Hamstrings, Glutes | Focus on upward acceleration |
Tuck (in place or F/B) | Knee, Hip & Spinal Flexion/Extension | Quad, Hamstrings, Glutes, Rectus Abdominus | Keep the rebound as knees pull up | |
Mogul (side to side) | Knee, Hip & Spinal Flexion/Extension, Spinal Lateral Flexion | Quads, Hamstrings, Glutes, Rectus Abdominus, Obliques | Align hips and shoulders front to avoid twisting | |
Jumping Jack | Hip AB/ADduction | Glues, Inner Thighs | Feet touch the middle | |
Cross Country | Hip Flexion/Extension | Hip Flexors, Quads, Glutes | Apply force on the directional change to increase intensity | |
NEUTRAL/ SUSPENSION | ||||
Cross Country | Hip and Knee Flexion/Extension | Hip flexors, Glutes, Quads, Hamstrings, Rectus Abdominus | Instruct to lengthen both legs | |
Jack | Hip and Knee Flexion/Extension, Hip AB/ADduction | Hip flexors, Glutes, Quads, Hamstrings, Rectus Abdominus | Instruct to extend legs to the side of the body | |
Flutter Kick | Hip and Knee Flexion/Extension | Quads, Hamstrings, Glues, Hip Flexors | Pointed toes create more resistance | |
Seated Kick | Knee Flexion/Extension | Quads, Hamstrings | Maintain upright posture | |
Shoot-Through | Side | Hip, Knee, Spinal Flexion/Extension, Spinal Lateral Flexion | Rectus Abdominus, Obliques, Hip Flexors, Glutes | Stack shoulders and hips in the extended position |
Front/Back | Hip, Knee, Spinal Flexion/Extension | Rectus Abdominus, Hip Flexors, Glues | Opposing arms will assist execution |
As a certified Aqua Fit Pro, you have learned how to combine movements to create choreography. Keep in mind how variations are combined for flow and muscle coordination. Make sure to practice the combinations, both in and out of the pool, and be aware of the moves that feel challenging before taking them to your students. Also be sure to understand how to provide progression and regression alternatives for those more and less advanced. Success is key for happy students and knowing how to build confidence will lead to stronger bodies both inside and out as well as put smiles on their faces.
About the Author, Connie Warasila
Connie Warasila is the former choreographer for WATERinMOTION®, faculty member of SCW Fitness Education, and certified by ACE, AEA, AFAA, Balanced Body, The Braining Center, Yoga Fit, Schwinn®, Reebok Cycle, and Moms in Motion. Awarded the Aquatic Exercise Association Fitness Professional of the Year, Connie has over 30 years of teaching experience in the USA and abroad. She has recently decided to further her education and pursue a degree in Finance and Accounting to help the fight against Human Trafficking.
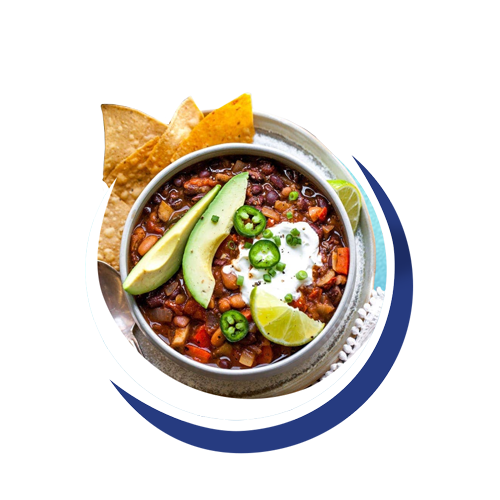
The cold is starting to settle in for much of the U.S., even in the Southeast, where evenings are starting to dip into the 50 and 60’s. What’s a more perfect, belly warming dish than a big bowl of piping hot chili. Not only are beans a great source of protein, but they are also filled with fiber and lots of vitamins and minerals. This version of a winter family favorite is guaranteed to have guests wanting seconds, or better yet, make a double batch to freeze for a future chilly night.

INGREDIENTS:
- 2 tablespoons of oil (like avocado or canola)
- 1 sweet onion (chopped)
- 3 carrots (cleaned & chopped)
- 2 cloves garlic (minced)
- 2 tablespoons chili powder
- 1 teaspoon cumin
- ½-1 teaspoon cayenne (spice to taste)
- Salt & pepper to taste
- 1 can of diced tomatoes (14.5 ounce)
- 1 can kidney beans (15 ounce, drained & rinsed)
- 1 can black beans (15 ounce, drained & rinsed)
- 1 cup uncooked quinoa
- 3 cups vegetable broth
TOPPING OPTIONS:
- Sliced jalapeños
- Sour cream
- Raw diced onion
- Shredded cheddar cheese
- Avocado
DIRECTIONS:
- In a large pot, sauté the onions, garlic, and carrots until tender
- Add tomatoes with liquid, chili powder, cumin, cayenne, and a touch of salt
- Add the two cans of beans, vegetable broth, and quinoa
- Bring to a simmer, cover, and let cook for 20 minutes
- Serve with brown rice (optional) and salad or vegetable
Bringing family and friends together is the perfect way to share meals, stories, traditions and so much more. SCW Fitness Education wishes you and yours a VERY HAPPY HOLIDAY SEASON.